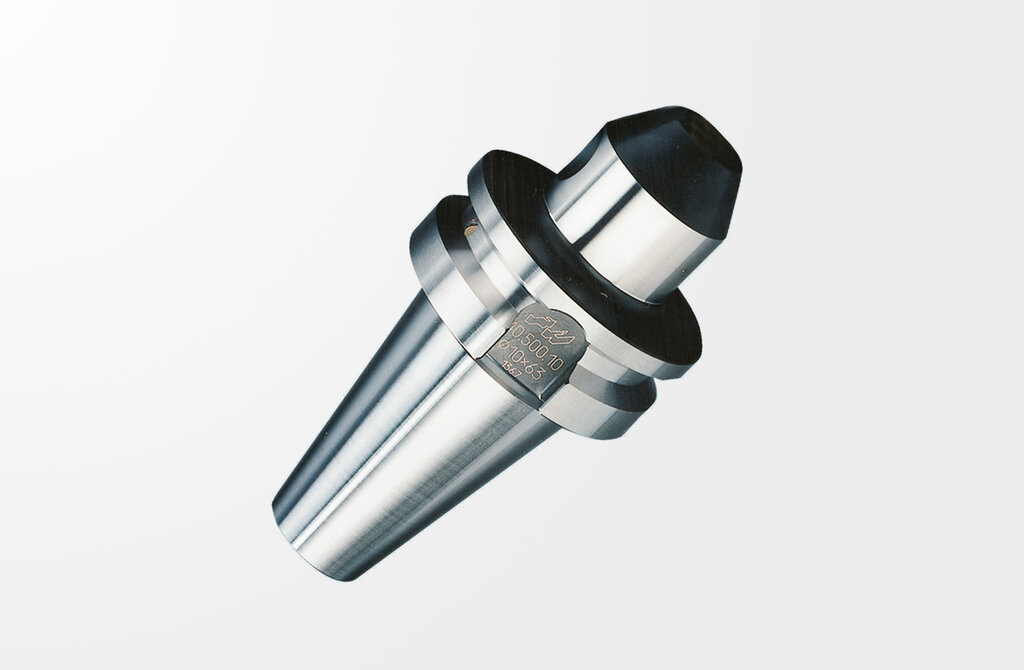
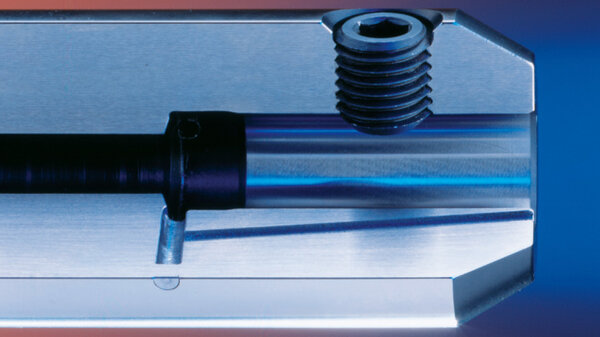
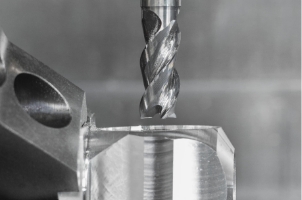
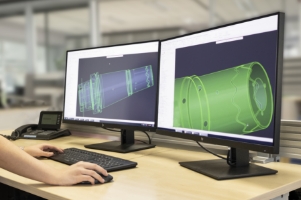
For clamping cutters with cylindrical shank and Weldon flat similar to DIN 1835-B and DIN 6535-HB.
According to DIN 6359 with taper JIS B 6339-2 BT50 Form JD/JF.
Form JD/JF: interior coolant supply through centre (Form JD) and through the collar (form JF)
Weldon Tool Holder, JIS B 6339-2, BT50
Weldon Tool Holder, JIS B 6339-2, BT50
Quality pass
Chuck body fine balanced G2.5 at 22.000 rpm
All functional surfaces fine machined
Taper tolerance AT3
Coolant supply form JD/JF
Scope of Delivery
- With clamping screw
HAIMER TIP
For a constant and acurate cooling of te cutting tool we recommend the optional cooling system Cool Jet.
Weldon Tool Holder, JIS B 6339-2, BT50

| Description | Norm: | Value: metric/ inch |
|---|---|---|
| Clamping diameter | D1 | 1.26 inch |
| Length A | A | 4.134 inch |
| A-length version | short | |
| Diameter 2 | D2 | 2.835 inch |
| Interface | BT50 | |
| Mass (weight) | D7 | 11.709 lbs |
| Standard number of properties layout | NSM | DIN4000-89 |
| Body diameter 1 | A1 | 2.835 inch |
| Flange diameter | A4 | 3.937 inch |
| Interference diameter | A6 | 2.289 inch |
| Length body diameter 1 | B1 | 2.638 inch |
| Protruding length | B3 | 4.134 inch |
| Overall length | B4 | 8.142 inch |
| Taper angle | B51 | 30 ° |
| Functional length | B71 | 3.189 inch |
| item style code | BLD | 508013 |
| Connection code type machine side | C11 | SKG |
| Connection code form type machine side | C12 | 57 |
| Connection thread nominal size machine side | C13 | M24 |
| Connection code unit base machine side | C14 | 9 |
| Connection code style machine side | C15 | 5 |
| Connection size code machine side | C2 | 0500 |
| Connection code type workpiece side | C51 | ZYL |
| Connection code form type workpiece side | C52 | 10 |
| Connection code unit base workpiece side | C54 | 1 |
| Connection code style workpiece side | C55 | 5 |
| Connection size code workpiece side | C6 | 0320 |
| Connection diameter min | C71 | 32 |
| Clamping length max. / nominal length | C81 | 2.563 inch |
| Balance grade | D5 | G2,5/22000 |
| Rotation speed, max | D6 | 22000 |
| Hand | E1 | N |
| coolant entry style code | H21 | 7 |
| coolant exit style code | H22 | 1 |
| Standard number | J1 | DIN1835-B, DIN6535-HB |
| Company identification | J3 | HAI |
| interface code to workpiece side | J4 | ZYL03201015 |
| interface code to machine side | J6 | SKG05005795 |
| Weight | WT | 11.709 lbs |
| Standard number of properties layout | NSM | DIN4000-89 |
| Body diameter 1 | BD1 | 2.835 inch |
| Flange diameter | DF | 3.937 inch |
| Interference diameter | DCINTF | 2.289 inch |
| Length body diameter 1 | LBD1 | 2.638 inch |
| Protruding length | LPR | 4.134 inch |
| Overall length | OAL | 8.142 inch |
| Taper angle | TA | 30 ° |
| Functional length | LF | 3.189 inch |
| Connection code type machine side | CCTMS | SKG |
| Connection code unit base workpiece side | CCUWS | 1 |
| Connection code style workpiece side | CCSWS | 5 |
| Connection size code workpiece side | CZCWS | 0320 |
| Connection diameter min | DCONN | 32 |
| Clamping length max. / nominal length | LSCX | 2.563 inch |
| Hand | HAND | N |
| coolant entry style code | CNSC | 7 |
| coolant exit style code | CXSC | 1 |
| Company identification | COMPC | HAI |
Downloads
Register to get access to free downloads of CAD data (DXF and STP) on our product websites.
Description
Weldon Tool Holder, JIS B 6339-2, BT50
Quality pass
Chuck body fine balanced G2.5 at 22.000 rpm
All functional surfaces fine machined
Taper tolerance AT3
Coolant supply form JD/JF
For clamping cutters with cylindrical shank and Weldon flat similar to DIN 1835-B and DIN 6535-HB.
According to DIN 6359 with taper JIS B 6339-2 BT50 Form JD/JF.
Form JD/JF: interior coolant supply through centre (Form JD) and through the collar (form JF)
According to DIN 6359 with taper JIS B 6339-2 BT50 Form JD/JF.
Form JD/JF: interior coolant supply through centre (Form JD) and through the collar (form JF)
Scope of Delivery
- With clamping screw
HAIMER TIP
For a constant and acurate cooling of te cutting tool we recommend the optional cooling system Cool Jet.
Technical specifications
Weldon Tool Holder, JIS B 6339-2, BT50

| Description | Norm: | Value: metric/ inch |
|---|---|---|
| Clamping diameter | D1 | 1.26 inch |
| Length A | A | 4.134 inch |
| A-length version | short | |
| Diameter 2 | D2 | 2.835 inch |
| Interface | BT50 | |
| Mass (weight) | D7 | 11.709 lbs |
| Standard number of properties layout | NSM | DIN4000-89 |
| Body diameter 1 | A1 | 2.835 inch |
| Flange diameter | A4 | 3.937 inch |
| Interference diameter | A6 | 2.289 inch |
| Length body diameter 1 | B1 | 2.638 inch |
| Protruding length | B3 | 4.134 inch |
| Overall length | B4 | 8.142 inch |
| Taper angle | B51 | 30 ° |
| Functional length | B71 | 3.189 inch |
| item style code | BLD | 508013 |
| Connection code type machine side | C11 | SKG |
| Connection code form type machine side | C12 | 57 |
| Connection thread nominal size machine side | C13 | M24 |
| Connection code unit base machine side | C14 | 9 |
| Connection code style machine side | C15 | 5 |
| Connection size code machine side | C2 | 0500 |
| Connection code type workpiece side | C51 | ZYL |
| Connection code form type workpiece side | C52 | 10 |
| Connection code unit base workpiece side | C54 | 1 |
| Connection code style workpiece side | C55 | 5 |
| Connection size code workpiece side | C6 | 0320 |
| Connection diameter min | C71 | 32 |
| Clamping length max. / nominal length | C81 | 2.563 inch |
| Balance grade | D5 | G2,5/22000 |
| Rotation speed, max | D6 | 22000 |
| Hand | E1 | N |
| coolant entry style code | H21 | 7 |
| coolant exit style code | H22 | 1 |
| Standard number | J1 | DIN1835-B, DIN6535-HB |
| Company identification | J3 | HAI |
| interface code to workpiece side | J4 | ZYL03201015 |
| interface code to machine side | J6 | SKG05005795 |
| Weight | WT | 11.709 lbs |
| Standard number of properties layout | NSM | DIN4000-89 |
| Body diameter 1 | BD1 | 2.835 inch |
| Flange diameter | DF | 3.937 inch |
| Interference diameter | DCINTF | 2.289 inch |
| Length body diameter 1 | LBD1 | 2.638 inch |
| Protruding length | LPR | 4.134 inch |
| Overall length | OAL | 8.142 inch |
| Taper angle | TA | 30 ° |
| Functional length | LF | 3.189 inch |
| Connection code type machine side | CCTMS | SKG |
| Connection code unit base workpiece side | CCUWS | 1 |
| Connection code style workpiece side | CCSWS | 5 |
| Connection size code workpiece side | CZCWS | 0320 |
| Connection diameter min | DCONN | 32 |
| Clamping length max. / nominal length | LSCX | 2.563 inch |
| Hand | HAND | N |
| coolant entry style code | CNSC | 7 |
| coolant exit style code | CXSC | 1 |
| Company identification | COMPC | HAI |
Downloads
Downloads
Register to get access to free downloads of CAD data (DXF and STP) on our product websites.
All product variants
With the help of our filter you can refine your search by selecting attributes.
Filter
| Order No. | A-length version | Clamping diameter | Interface | Length A | Downloads | metric/ inch |
|---|---|---|---|---|---|---|
| 50.500.06 | short | 0.236 inch | BT50 | 2.48 inch |
Download after registration
|
|
| 50.500.08 | short | 0.315 inch | BT50 | 2.48 inch |
Download after registration
|
|
| 50.500.10 | short | 0.394 inch | BT50 | 2.756 inch |
Download after registration
|
|
| 50.500.12 | short | 0.472 inch | BT50 | 3.15 inch |
Download after registration
|
|
| 50.500.16 | short | 0.63 inch | BT50 | 3.15 inch |
Download after registration
|
|
| 50.500.20 | short | 0.787 inch | BT50 | 3.15 inch |
Download after registration
|
|
| 50.500.25 | short | 0.984 inch | BT50 | 3.937 inch |
Download after registration
|
|
| 50.500.32 | short | 1.26 inch | BT50 | 4.134 inch |
Download after registration
|
|
| 50.500.40 | short | 1.575 inch | BT50 | 4.528 inch |
Download after registration
|
Haimer Care
The quality at Haimer is not only
by the product, but also by the
accompanying services.
Scope of service
- Early wear detection
- Preservation of the target condition
- High availability of HAIMER specialists
- Consistent quality level
- Prerequisite for certification according to ISO 9001
