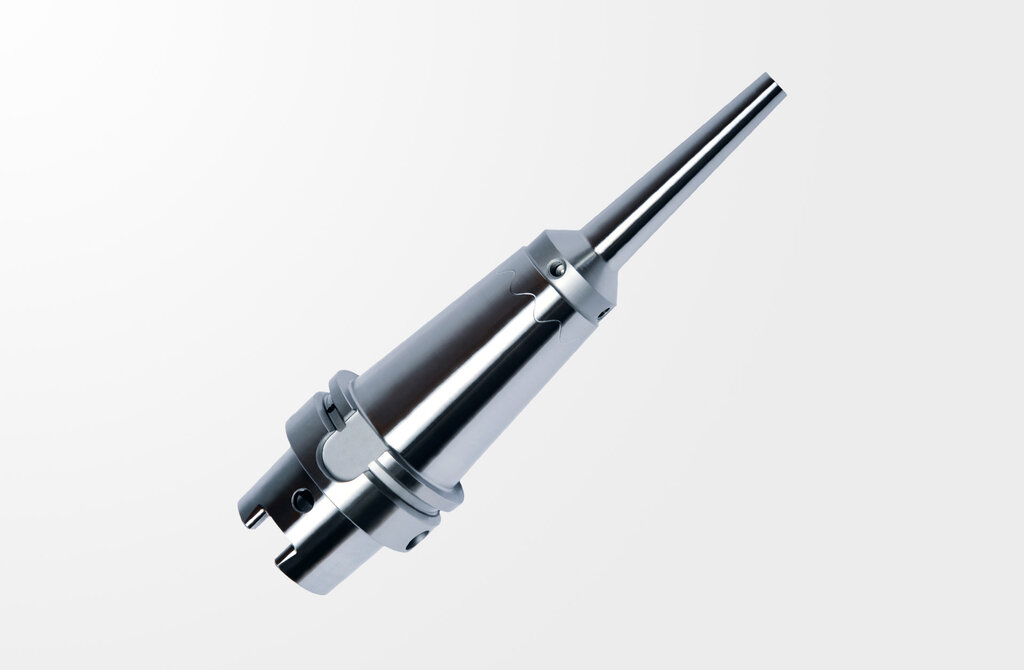
Shrink fit chuck suitable to all inductive shrink fit units.
Power Mini Shrink Chuck is perfect for 5-axis-machining in the die & mould and in the medical industry. Very slim at the top like the HAIMER Mini Shrink Chucks, Power Mini Shrink is reinforced at the base. Thereby efficient milling is possible with an angled tool even at long protruding lengths.


Description
Power Mini Shrink Chuck extra slim, DIN 69893-1, HSK-A63
Quality pass
Chuck fine balanced G2.5 at 25.000 rpm
All functional surfaces fine machined
More accurate than DIN
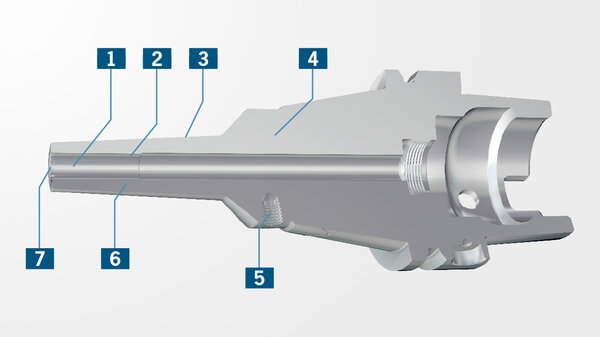
- Extra slim design (1.5 mm wall thickness)
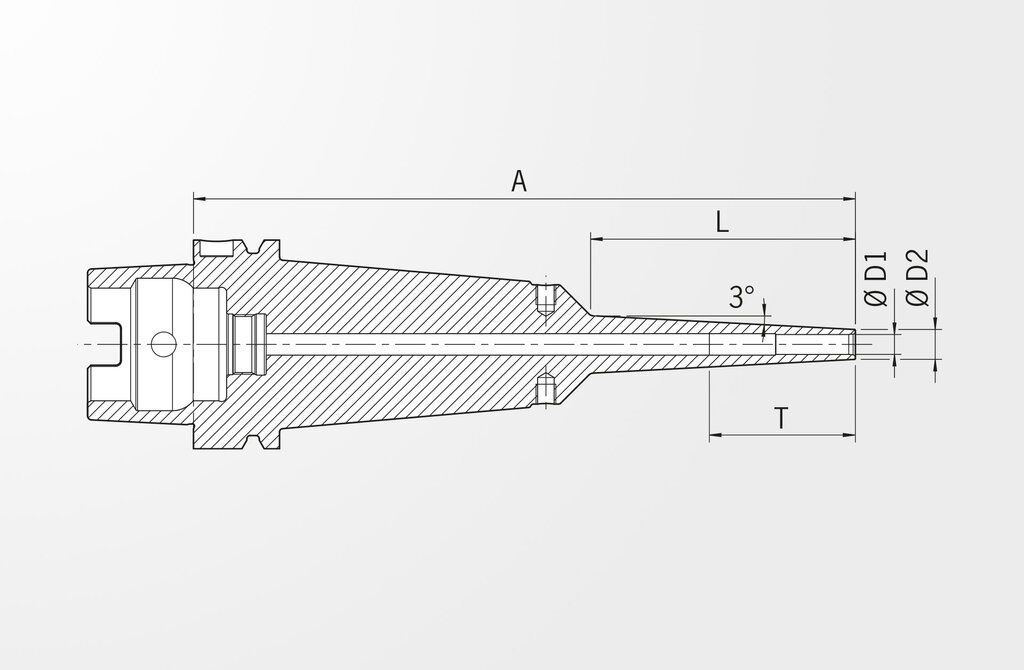
- 3° slope at the top
- With threaded holes in order to balance with balancing screws
- For solid carbide tools with shank tolerance h6
- Heat-resistant hot-working steel
- Hardened 54-2 HRC
HAIMER TIP
Attention: Heating and cooling sleeves are needed when shrinking on most shrink fit machines (see accessories). However, when using the Power Clamp i4.0 Sprint/Air or Nano machines with the motorized coil and scanner, sleeves are not necessary.


Technical specifications

Notice
Technical data subjects to change without prior notice.
| Description | Norm: HAIMER | Value: metric/inch |
|---|---|---|
| Clamping diameter | D1 | 10 mm / 0.394 inch |
| Length A | A | 130 mm / 5.118 inch |
| A-length version | ZG130 | |
| Diameter 2 | D2 | 13 mm / 0.512 inch |
| Length | L | 50 mm / 1.969 inch |
| Interface | HSK-A63 |
| Description | Norm: DIN 4000 | Value: metric/inch |
|---|---|---|
| Mass (weight) | D7 | 1,212 kg |
| Standard number of properties layout | NSM | DIN4000-89 |
| Body diameter 1 | A1 | 17,291 mm / 0.681 inch |
| Body diameter 2 | A2 | 36 mm / 1.417 inch |
| Body diameter 3 | A22 | 38 mm / 1.496 inch |
| Body diameter 4 | A23 | 51 mm / 2.008 inch |
| Flange diameter | A4 | 63 mm / 2.48 inch |
| Interference diameter | A6 | 12 mm / 0.472 inch |
| Length body diameter 1 | B1 | 50 mm / 1.969 inch |
| Length body diameter 2 | B2 | 17,75 mm / 0.699 inch |
| Length body diameter 3 | B22 | 0,592 mm / 0.023 inch |
| Protruding length | B3 | 130 mm / 5.118 inch |
| Overall length | B4 | 162 mm / 6.378 inch |
| Taper angle | B51 | 3 ° |
| Taper angle 2 | B611 | 45 ° |
| Taper angle 3 | B621 | 60 ° |
| Taper angle 4 | B631 | 10 ° |
| Functional length | B71 | 63 mm / 2.48 inch |
| item style code | BLD | 504145 |
| Connection code type machine side | C11 | HSK |
| Connection code form type machine side | C12 | 01 |
| Connection code unit base machine side | C14 | 1 |
| Connection code style machine side | C15 | 5 |
| Connection size code machine side | C2 | 0630 |
| Connection code type workpiece side | C51 | ZYL |
| Connection code form type workpiece side | C52 | 01 |
| Connection code unit base workpiece side | C54 | 1 |
| Connection code style workpiece side | C55 | 5 |
| Connection size code workpiece side | C6 | 0100 |
| Connection diameter min | C71 | 10 |
| Clamping length max. / nominal length | C81 | 67 mm / 2.638 inch |
| Clamping length, min., workpiece side | C82 | 42 mm / 1.654 inch |
| Balancing device | D51 | 1 |
| Hand | E1 | N |
| coolant entry style code | H21 | 1 |
| coolant exit style code | H22 | 1 |
| Company identification | J3 | HAI |
| interface code to workpiece side | J4 | ZYL01000115 |
| interface code to machine side | J6 | HSK06300115 |
| Description | Norm: ISO 13399 | Value: metric/inch |
|---|---|---|
| Weight | WT | 1,212 kg |
| Standard number of properties layout | NSM | DIN4000-89 |
| Body diameter 1 | BD1 | 17,291 mm / 0.681 inch |
| Flange diameter | DF | 63 mm / 2.48 inch |
| Interference diameter | DCINTF | 12 mm / 0.472 inch |
| Length body diameter 1 | LBD1 | 50 mm / 1.969 inch |
| Protruding length | LPR | 130 mm / 5.118 inch |
| Overall length | OAL | 162 mm / 6.378 inch |
| Taper angle | TA | 3 ° |
| Functional length | LF | 63 mm / 2.48 inch |
| Connection code type machine side | CCTMS | HSK |
| Connection code unit base workpiece side | CCUWS | 1 |
| Connection code style workpiece side | CCSWS | 5 |
| Connection size code workpiece side | CZCWS | 0100 |
| Connection diameter min | DCONN | 10 |
| Clamping length max. / nominal length | LSCX | 67 mm / 2.638 inch |
| Hand | HAND | N |
| coolant entry style code | CNSC | 1 |
| coolant exit style code | CXSC | 1 |
| Company identification | COMPC | HAI |